fuzzymoomoo Posted September 23, 2020 Share Posted September 23, 2020 10 minutes ago, blksn8k2 said: Fuzzy I have to believe modern day body tolerances and assembly equipment and techniques are vastly improved over what they were 50 years ago but it must still be a tedious job. It does help that the fenders go on after the doors but I still found it to be a PITA. Quote Link to comment Share on other sites More sharing options...
blksn8k2 Posted September 23, 2020 Author Share Posted September 23, 2020 The new door hinges for the driver side came yesterday. After literally hours of adjusting and adding and subtracting shims, etc. I finally settled on this. The gaps are pretty uniform. Not perfect but okay. Both fenders have been moved back by about 3/16" which really helped. One of the issues that I really struggled with was getting the door to latch properly and not drop when opened while still maintaining all the gaps. I'm still waiting on the new passenger side door hinges plus some other hardware. After that door is done next up will be the alignment, or should I say realignment, of the hood. 1 Quote Link to comment Share on other sites More sharing options...
tbone Posted September 24, 2020 Share Posted September 24, 2020 23 hours ago, fuzzymoomoo said: Now imagine fitting a door on an assembly line in 90 seconds or less. I hated that job and traded it to someone else every time it came around in the rotation until they decided it was a better idea to just have 1 person doing it all the time. I can imagine, not much fun. I’m sympathetic to the guy installing them knowing the challenge. Quote Link to comment Share on other sites More sharing options...
fuzzymoomoo Posted September 24, 2020 Share Posted September 24, 2020 50 minutes ago, tbone said: I can imagine, not much fun. I’m sympathetic to the guy installing them knowing the challenge. I hung doors for almost 2 years (fit and door hang are part of the same team). I'll take hanging doors any day of the week over Fit. I'll glad I moved on from that line though, it's probably the worst team in body shop in terms of job difficulty. Quote Link to comment Share on other sites More sharing options...
blksn8k2 Posted September 24, 2020 Author Share Posted September 24, 2020 I received the new passenger side door hinges and installed them yesterday. I also received and installed a windshield wiper motor relocation bracket which is necessary when using a soft top since the new top is much lower than the old steel top. The hood looks like getting it adjusted could be a bit of a nightmare. To start with that sucker is heavy which makes moving it around that much more difficult. And it's not like a normal vehicle where there is typically a separate cowl panel which includes a grilled air intake opening for the heating and ventilation system. On the Bronco there are two small openings on the back corners of the hood for that purpose which means the hood is also longer and much heavier than on a "normal" vehicle. The hood hinges are odd as well. There are two short pieces of "piano" hinge each about 4" long and they attach to the body at the base of the windshield. Kinda like the door on your lawn mower shed. Anyway, there has always been a slight interference near the front where the hood and passenger fender meet. To compensate, someone added more shims to the hood hinge on that side which cocks the hood to the left at the front so that it sort of clears the passenger side fender. Now that I have moved both fenders back to close the gaps with the doors the hood needs to move back about the same distance. I'm hoping I can remove enough shims from the hood hinges and maybe push the entire front clip sideways at the front to get everything back to "square". Fingers crossed. I also did some damage repair on the tailgate. Someone either backed into something with the tailgate down or a tree or something fell on it because it was dented. It's weird though because there was a dent near the top on the outside and inside faces but not on the top edge. There was about a half inch of bondo on the outside where someone tried to fill that dent. It actually looked fine except that rust had either started or was always there under the bondo and it had started to crack. After removing all the old mud and rust I used a slide hammer to pop the dent out as best I could and then applied some fiberglass reinforced bondo. I suppose the right way to fix that would be to cut out the damaged metal and weld in a new piece. Or just pay $425 for a new tailgate. Maybe someday. The good news is that most of that area will be covered by an aluminum piece of angle which is what the rear window of the soft top attaches to. Ah the joy of working on a 45 year old vehicle.? 1 Quote Link to comment Share on other sites More sharing options...
tbone Posted September 25, 2020 Share Posted September 25, 2020 On 9/23/2020 at 8:49 AM, blksn8k2 said: The new door hinges for the driver side came yesterday. After literally hours of adjusting and adding and subtracting shims, etc. I finally settled on this. The gaps are pretty uniform. Not perfect but okay. Both fenders have been moved back by about 3/16" which really helped. One of the issues that I really struggled with was getting the door to latch properly and not drop when opened while still maintaining all the gaps. I'm still waiting on the new passenger side door hinges plus some other hardware. After that door is done next up will be the alignment, or should I say realignment, of the hood. You are rolling right along. Is the door slightly open in the bottom picture or is that a shadow from something else? Quote Link to comment Share on other sites More sharing options...
blksn8k2 Posted September 29, 2020 Author Share Posted September 29, 2020 On 9/25/2020 at 12:54 AM, tbone said: Is the door slightly open in the bottom picture or is that a shadow from something else? If you're asking about that gray spot at the top of the quarter panel that's actually where I fixed some shipping damage in the gelcoat (a couple of chips along the vertical edge) and sprayed primer over the repair. But the door also didn't fit evenly with the top of the rocker panel either. The bottom of the door sat flush with the rocker at the front but kicked out a little more than the rocker at the rear. I bought a new rocker and did some trial fitting of that today. The rocker will now be even with the bottom of the door for it's full length and the door, rocker and quarter panel will all be flush. As I mentioned before this whole area will eventually be covered by the rock sliders but I still don't want any odd gaps between the sliders and the rest of the body. The old rocker also looked like crap where it met the door jam when the door was open. Quote Link to comment Share on other sites More sharing options...
tbone Posted September 30, 2020 Share Posted September 30, 2020 2 hours ago, blksn8k2 said: If you're asking about that gray spot at the top of the quarter panel that's actually where I fixed some shipping damage in the gelcoat (a couple of chips along the vertical edge) and sprayed primer over the repair. But the door also didn't fit evenly with the top of the rocker panel either. The bottom of the door sat flush with the rocker at the front but kicked out a little more than the rocker at the rear. I bought a new rocker and did some trial fitting of that today. The rocker will now be even with the bottom of the door for it's full length and the door, rocker and quarter panel will all be flush. As I mentioned before this whole area will eventually be covered by the rock sliders but I still don't want any odd gaps between the sliders and the rest of the body. The old rocker also looked like crap where it met the door jam when the door was open. Yes, that was the area I was seeing. Replacing that rocker gave you some flexibility in fitment. Quote Link to comment Share on other sites More sharing options...
blksn8k2 Posted October 10, 2020 Author Share Posted October 10, 2020 As planned, progress was interrupted for a few days by archery deer season. I filled that tag a couple of days ago so it's back to the Bronco until the archery black bear season comes in on the 17th followed by the fall wild turkey season which starts on the 31st. Starting to get the driver side door jam and rocker panel ready for paint. Also started trial fitting the soft top frame which requires a few extra holes in the tops of the quarter panels and tailgate. All of those holes need to be located and drilled before paint. BTW, those leather seats are from a mid-80s FWD Dodge Daytona, of all things. They are obviously starting to show their age but they are still super comfortable and well bolstered. A local upholstery shop quoted $650 to redo them. If I could find replacement covers I would do them myself. Not sure if I want to spend that kind of money on those when I can buy brand new aftermarket seats for about the same price. Quote Link to comment Share on other sites More sharing options...
blksn8k2 Posted October 10, 2020 Author Share Posted October 10, 2020 Started drilling holes for the side trim and some of the soft top frame brackets. Quote Link to comment Share on other sites More sharing options...
tbone Posted October 11, 2020 Share Posted October 11, 2020 23 hours ago, blksn8k2 said: As planned, progress was interrupted for a few days by archery deer season. I filled that tag a couple of days ago so it's back to the Bronco until the archery black bear season comes in on the 17th followed by the fall wild turkey season which starts on the 31st. Starting to get the driver side door jam and rocker panel ready for paint. Also started trial fitting the soft top frame which requires a few extra holes in the tops of the quarter panels and tailgate. All of those holes need to be located and drilled before paint. BTW, those leather seats are from a mid-80s FWD Dodge Daytona, of all things. They are obviously starting to show their age but they are still super comfortable and well bolstered. A local upholstery shop quoted $650 to redo them. If I could find replacement covers I would do them myself. Not sure if I want to spend that kind of money on those when I can buy brand new aftermarket seats for about the same price. You think Katzkin makes leather covers for the Daytona, lol. How long Do you think it will be before you are ready to paint? Quote Link to comment Share on other sites More sharing options...
blksn8k2 Posted October 11, 2020 Author Share Posted October 11, 2020 11 hours ago, tbone said: How long Do you think it will be before you are ready to paint? You've asked that question before and the answer is still the same. If there's anything I have learned about body work (which admittedly isn't much) it's that haste makes waste and patience is way more valuable than speed. ? In case anyone was wondering, here's why there are three shift levers sticking out of the floor. The tallest one controls the NV3550 five-speed while the other two control the original Dana 20 transfer case. That's what is known as a "twin stick" conversion. The way it works is that each lever controls the power going to each axle and you can do that somewhat independently of each other. In other words, you can run with just the rear axle engaged, just the front axle, or both. And, you can run either axle in high or low range. That can obviously be both good and bad. It is good in that you have the option to use only whichever axle has the best traction available or is needed to maneuver in a tight situation and you can do that in whichever gear ratio is needed (1:1 high range or 2:1 low). It is bad in that you don't want to have both axles engaged at the same time but one in high range and the other in low. If you do that you WILL break something. Probably a good reason why they never offered the twin stick option from the factory. The whole drivetrain combination works surprisingly well. When you combine the torque output of the 393 cu in V8 with the 4.01:1 first gear ratio of the NV3550, the 2:1 low range ratio of the transfer case, the 4.11:1 axle ratios (the Dana 44 front axle is actually 4.10:1), the Detroit Locker in the 9" Ford rear differential and 35" mud-terrain radial tires, this thing is an off-road beast. The NV3550 also has an overdrive fifth gear ratio of 0.78:1 so highway performance isn't too bad either. The one change I might consider in the future would be switching from the 750 cfm Holley dual-feed carb to a Holley Sniper or similar throttle body FI system. Another interesting option might be the multiport fuel injection system from the original F-150 Lightning which also used the 351W block. 1 Quote Link to comment Share on other sites More sharing options...
tbone Posted October 11, 2020 Share Posted October 11, 2020 4 hours ago, blksn8k2 said: You've asked that question before and the answer is still the same. If there's anything I have learned about body work (which admittedly isn't much) it's that haste makes waste and patience is way more valuable than speed. ? In case anyone was wondering, here's why there are three shift levers sticking out of the floor. The tallest one controls the NV3550 five-speed while the other two control the original Dana 20 transfer case. That's what is known as a "twin stick" conversion. The way it works is that each lever controls the power going to each axle and you can do that somewhat independently of each other. In other words, you can run with just the rear axle engaged, just the front axle, or both. And, you can run either axle in high or low range. That can obviously be both good and bad. It is good in that you have the option to use only whichever axle has the best traction available or is needed to maneuver in a tight situation and you can do that in whichever gear ratio is needed (1:1 high range or 2:1 low). It is bad in that you don't want to have both axles engaged at the same time but one in high range and the other in low. If you do that you WILL break something. Probably a good reason why they never offered the twin stick option from the factory. The whole drivetrain combination works surprisingly well. When you combine the torque output of the 393 cu in V8 with the 4.01:1 first gear ratio of the NV3550, the 2:1 low range ratio of the transfer case, the 4.11:1 axle ratios (the Dana 44 front axle is actually 4.10:1), the Detroit Locker in the 9" Ford rear differential and 35" mud-terrain radial tires, this thing is an off-road beast. The NV3550 also has an overdrive fifth gear ratio of 0.78:1 so highway performance isn't too bad either. The one change I might consider in the future would be switching from the 750 cfm Holley dual-feed carb to a Holley Sniper or similar throttle body FI system. Another interesting option might be the multiport fuel injection system from the original F-150 Lightning which also used the 351W block. Whoops, forgive my impatience. By your previous statement I was gathering you were close. I’m looking forward to seeing the completed project so I jumped the gun. I’ve never seen the twin stick setup, so thanks for the enlightenment. Does that configuration allow for the ultra tight turning radius similar to the current electronically controlled setups that we have been seeing as of late? Quote Link to comment Share on other sites More sharing options...
blksn8k2 Posted October 13, 2020 Author Share Posted October 13, 2020 On 10/11/2020 at 4:50 PM, tbone said: Does that configuration allow for the ultra tight turning radius similar to the current electronically controlled setups that we have been seeing as of late? I doubt it would have much if any affect on the turning radius. I assume that would require a change to the steering geometry. I suppose, however, that there could be some low speed circumstances when you were sending power to the front axle only that the ability to drag or slide the rear tires around or over some obstacle might give you the ability to turn a little tighter. That would be a better question for a rock crawling expert. 1 Quote Link to comment Share on other sites More sharing options...
blksn8k2 Posted October 13, 2020 Author Share Posted October 13, 2020 Trail fitting the soft top frame and side trim today. No major surprises. I also had the windshield laid down on the hood. I wanted to see where to add shims if necessary to adjust the angle of the windshield. Once I get the top on I should have a better idea how everything is fitting but the angle and gaps between the windshield and door window frames look good, so far. If anything, instead of adding shims I might need to grind some material off the steel pads that the windshield lies back against and that are located between the base of the windshield and the back of the instrument panel frame. That would hopefully close the gaps at the tops of the door window frames a little better but it's probably not necessary. There are two large knobs on either end of the instrument panel that are tightened to pull the dash tight to those pads and that have to be removed to allow the windshield to fold forward onto the hood. There is also a full width piano hinge at the base of the windshield. Pretty sure that wasn't considered high tech even in the mid 60s. If the dash looks a little odd it's because I removed the old pad. I have a new one but it will stay in the box until after paint. 1 Quote Link to comment Share on other sites More sharing options...
blksn8k2 Posted October 14, 2020 Author Share Posted October 14, 2020 I did a trial fit of the soft top this morning. Man, that thing is a bear to stretch over the frame and get snapped into place, especially by yourself and on a cold day. Fortunately, the bow mounting brackets are slotted so you can release some of the tension. Hopefully we will get a warm day or two and it will stretch out even more. The perimeter of the cover has hard plastic flaps sewn into it that roll under and into grooves in the metal frame. Surprisingly there are only eight actual snaps and two of those are at the outside top corners of the windshield frame. I still need to drill holes for those snaps which is one of the reasons I wanted to install the top so I could mark where those holes need to be. It also looks like the top pulled the windshield into better alignment with the door frames which should mean a lot less wind noise and potential for water leaks. Now if the wrinkles in the plastic windows would just go away. Not holding my breath on that one though. They are all held in place by zippers so they are removable. 1 1 Quote Link to comment Share on other sites More sharing options...
blksn8k2 Posted October 20, 2020 Author Share Posted October 20, 2020 I wasn't happy with the way the door window frames fit the soft top at the upper rear corners. While I was able to push the soft top frame outward a little by adding a temporary bow, that still did not close the gaps between the top and the door window frames. I did not want to try to re-adjust the doors because it took forever to get them to fit the rest of the body panels. Again, this was really only a problem at the upper back corners of the window frames. The fit at the windshield and upper front corners of the door windows was fine. I believe the reason for all that is because the fiberglass quarter panels are thicker than and sit on top of the existing sheet metal which means that in order to align with the quarter panels the back edge of each door has to be farther out than stock and the soft top frame was never intended to account for that. So, I decided to try to change the angle of the door window frames at the rear by cutting a slot at the bottom through the original factory weld between the door shell and the window frame and then bending the back of each window frame inward at the top. I was amazed by how much a single saw cut about 3/4 of the way through the base of the window frame allowed me to change the angle of the window frame. After tack welding the frames at the new angle there are no more gaps, the door window frames still align with the windshield frame, the windows still roll up and down smoothly and I was able to get rid of the extra bow. It not only looks better but should also reduce wind noise and do a better job of keeping the weather out. ? BTW, that extra bow was a red-neck engineered zip tie and a piece of PVC pipe left over from a water heater installation. LOL Quote Link to comment Share on other sites More sharing options...
blksn8k2 Posted November 4, 2020 Author Share Posted November 4, 2020 Passenger side door in primer. Quote Link to comment Share on other sites More sharing options...
blksn8k2 Posted November 9, 2020 Author Share Posted November 9, 2020 Started adding a little color today. I'm spraying the quarter panels and passenger door off the vehicle. I'm not confident enough to risk spraying those large vertical surfaces while on the vehicle. By laying them flat I'm not fighting gravity as much and way less likely to get sags and runs. I mounted the passenger side quarter panel back on the Bronco temporarily since that is the safest place to keep it. So far I've done the base coat on both quarters, both door jams and both rocker panels. The passenger side door and top half of the tailgate will get color next and then I can start spraying the clear, shiny stuff. In case you haven't figured it out yet, this is definitely a low buck, do it yourself operation. ? 1 Quote Link to comment Share on other sites More sharing options...
fuzzymoomoo Posted November 10, 2020 Share Posted November 10, 2020 Jeebus, clutch pedals were wide back in 1975 Quote Link to comment Share on other sites More sharing options...
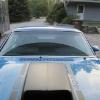
blksn8k2 Posted November 17, 2020 Author Share Posted November 17, 2020 Finally sprayed the clear on the quarter panels. I still need to buff and polish. Also removed the windshield so I can clean the frame and paint the interior side. It is obviously not original to the Bronco. The orange paint was hidden behind the dash and the wiper linkage cover. The last photo is a snapshot I took of a Ford commercial that aired yesterday during the Steelers game. Look familiar? 1 Quote Link to comment Share on other sites More sharing options...
blksn8k2 Posted November 18, 2020 Author Share Posted November 18, 2020 I decided to paint the interior side of the windshield frame satin black. The exposed metal on the interior side of the doors will also be black as opposed to grabber green. The dash will remain white. 1 Quote Link to comment Share on other sites More sharing options...
blksn8k2 Posted November 28, 2020 Author Share Posted November 28, 2020 Sprayed the color on the passenger side door today. Will have to wait for a clear day with low humidity before I can spray the clear. Also painted the inside of both doors satin black a few days ago. 2 Quote Link to comment Share on other sites More sharing options...
blksn8k2 Posted November 28, 2020 Author Share Posted November 28, 2020 Sprayed the clear on the passenger door today. 1 Quote Link to comment Share on other sites More sharing options...
blksn8k2 Posted November 28, 2020 Author Share Posted November 28, 2020 Just finished spraying the clear on both quarter panels. Had to take advantage of the clear, dry weather today. ? Quote Link to comment Share on other sites More sharing options...

Recommended Posts
Join the conversation
You can post now and register later. If you have an account, sign in now to post with your account.
Note: Your post will require moderator approval before it will be visible.